Janome’s 3160QDC is a robust machine, designed with quilters in mind, offering a blend of features and reliability; explore its instruction manual!
Overview of the Machine
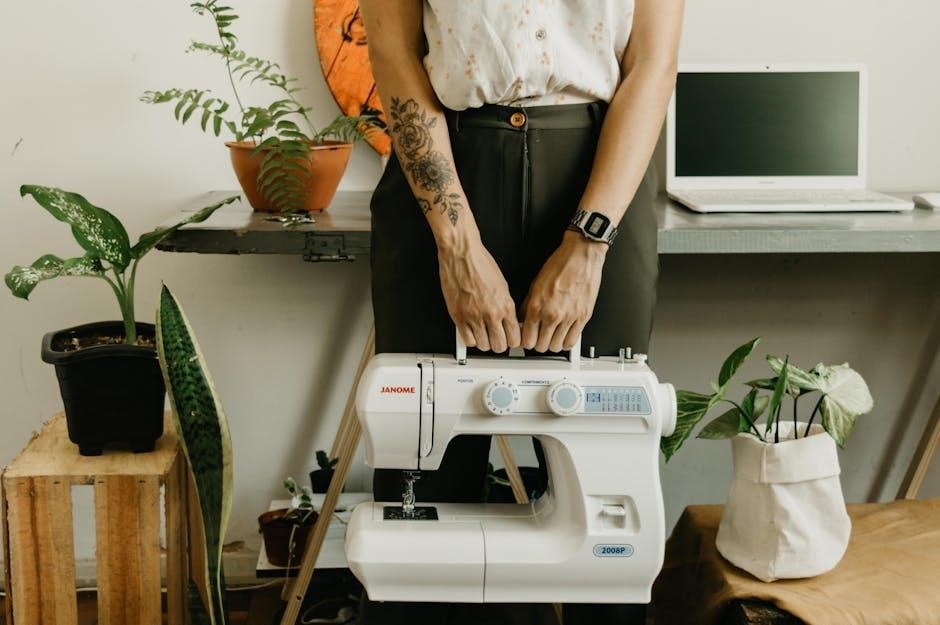
The Janome 3160QDC is a full-featured, computerized sewing machine specifically engineered to meet the demands of quilting and general sewing enthusiasts. This machine boasts 60 built-in stitches, providing versatility for a wide range of projects. It features a user-friendly interface, making stitch selection and adjustments straightforward, even for beginners.
A key highlight is its extended 9-inch throat space, ideal for comfortably handling larger quilts and fabric pieces. The instruction manual details its robust construction and reliable performance. It includes a convenient needle up/down function, perfect for precise pivoting and appliqué work. The machine also incorporates a drop-in bobbin system for easy setup and monitoring.
Designed for both novice and experienced sewers, the 3160QDC offers a balance of power, precision, and ease of use, making it a valuable addition to any sewing room.
Key Features and Benefits
The Janome 3160QDC shines with its 60 built-in stitches, catering to diverse sewing needs, as detailed in the instruction manual. Its standout feature is the generous 9-inch throat space, simplifying quilt handling. The user-friendly LCD screen and simple controls ensure effortless stitch selection and customization.
Benefits include a convenient needle up/down function for precise pivoting, and a drop-in bobbin system for easy threading and monitoring. The machine’s speed control allows for precise sewing, while the reverse stitch lever provides secure seam finishing.
Furthermore, the 3160QDC offers adjustable stitch length and width, enhancing creative possibilities. Its robust construction guarantees durability, making it a reliable companion for years of sewing enjoyment.
Target User: Quilters and Sewing Enthusiasts
The Janome 3160QDC, as explained in its comprehensive instruction manual, is ideally suited for both passionate quilters and dedicated sewing enthusiasts. Its 9-inch throat space is a significant advantage for quilting larger projects, allowing for comfortable fabric manipulation without constant repositioning.
Sewing enthusiasts will appreciate the machine’s versatility, offering 60 built-in stitches for a wide range of applications, from garment construction to home décor. The adjustable stitch length and width provide creative control, while the user-friendly interface simplifies operation.
Beginners will find the machine approachable, and experienced sewers will value its reliability and advanced features. It’s a machine designed to grow with the user’s skills and inspire creativity.
Setting Up Your Janome 3160QDC
Carefully unpack your Janome 3160QDC, referencing the instruction manual for component identification; ensure all parts are present before proceeding with setup.
Unboxing and Initial Inspection
Carefully remove your Janome 3160QDC sewing machine from its packaging, retaining the box and packing materials for potential future transport or storage. A thorough initial inspection, guided by the instruction manual, is crucial. Verify the presence of all listed components: the sewing machine itself, foot pedal, power cord, various presser feet, bobbins, needle set, screwdriver, seam ripper, and the instruction manual.
Inspect the machine for any visible signs of damage incurred during shipping. Check for dents, scratches, or loose parts. Ensure the handwheel moves freely and that all covers and access panels are securely fastened. Refer to the diagrams in the manual to familiarize yourself with the machine’s key parts. Document any discrepancies or damage immediately and contact your retailer or Janome customer support. A complete inventory and inspection now will prevent issues later.
Attaching the Power Cord and Foot Pedal
Before connecting power, ensure the machine’s power switch is in the “OFF” position. Locate the power cord socket on the back of the Janome 3160QDC, as illustrated in your instruction manual. Firmly insert the power cord plug into the socket until it clicks securely. Next, connect the foot pedal cable to the designated port, also on the rear of the machine; again, ensure a secure connection.
The foot pedal controls the sewing speed, so proper connection is vital. Avoid forcing the plugs; incorrect insertion can damage the ports. Once connected, plug the power cord into a grounded electrical outlet. Do not use extension cords or adapters unless absolutely necessary, and always verify they are properly grounded. Refer to the manual’s safety precautions regarding electrical connections.
Winding the Bobbin
Consult your Janome 3160QDC instruction manual for detailed diagrams. First, place the thread spool on the spool pin. Guide the thread through the thread guide, then onto the bobbin; Secure the bobbin onto the bobbin winder spindle. Push the bobbin winder spindle to the right, engaging it.
Hold the thread tail firmly, then press the foot pedal gently to start winding. The machine will automatically stop when the bobbin is full. Disengage the bobbin winder by pushing the spindle back to the left. Remove the full bobbin and trim the thread. Proper winding ensures even stitches; refer to the manual for troubleshooting uneven winding issues. Always use quality thread for optimal results.
Threading the Upper Thread
Refer to your Janome 3160QDC instruction manual for a clear threading diagram. Begin by raising the presser foot. Place the spool of thread on the spool pin. Guide the thread through the first thread guide, then down and around the tension disc. Continue threading through the take-up lever, ensuring it’s in its highest position;
Next, thread through the thread guide above the needle, and finally, thread the needle from front to back. Pull a few inches of thread through the needle. Proper threading is crucial for stitch formation; consult the manual if experiencing issues. Always use the correct thread type for your fabric. Double-check each step for accurate threading.
Threading the Bobbin Case
The Janome 3160QDC instruction manual details the bobbin threading process. After winding the bobbin, insert it into the drop-in bobbin case, ensuring it rotates freely. Guide the thread through the tension spring on the bobbin case; a small click confirms proper engagement.
Draw up approximately 4-6 inches of thread through the slot in the bobbin case. This is vital for initial stitch formation. Refer to the manual’s diagram for correct thread path. Incorrect bobbin threading is a common cause of sewing problems. Always ensure the bobbin is inserted correctly and the thread flows smoothly through the tension mechanism.

Understanding the Janome 3160QDC Controls
The Janome 3160QDC instruction manual illustrates the machine’s controls, including the power switch, stitch selection dial, and adjustment levers for optimal sewing.
Power Switch and Speed Control
According to the Janome 3160QDC instruction manual, the power switch, prominently located on the machine’s body, initiates operation and ensures safety. It features an ‘off’ position for secure storage and prevents accidental activation. The speed control slider, conveniently positioned near the foot pedal, allows for precise adjustments to sewing speed.
Beginners can start with slower speeds for greater control, while experienced users can increase the pace for efficiency. The manual emphasizes the importance of gradual speed increases to maintain stitch quality and prevent fabric slippage. Proper utilization of the speed control enhances the sewing experience, accommodating various fabrics and techniques. Always refer to the manual for detailed illustrations and safety guidelines regarding the power switch and speed control functionality.
Stitch Selection Dial
The Janome 3160QDC instruction manual details the function of the stitch selection dial, a central control for choosing desired stitch patterns. This dial presents a range of options, including straight stitch, zigzag stitch, and decorative stitches, catering to diverse sewing projects. The manual illustrates each stitch with a clear diagram, aiding in accurate selection.
To select a stitch, simply rotate the dial to align the desired stitch number with the indicator mark. The manual stresses the importance of verifying the selected stitch before commencing sewing. Different fabrics and techniques require specific stitch types; consulting the manual ensures optimal results. Proper stitch selection contributes significantly to the quality and durability of your finished projects.
Stitch Length and Width Adjustment
The Janome 3160QDC instruction manual explains how to fine-tune stitch length and width using dedicated dials or sliders. Stitch length controls the distance between stitches, impacting fabric strength and appearance; shorter lengths for delicate fabrics, longer for heavier materials. Width adjustment applies to zigzag and decorative stitches, altering the breadth of the stitch pattern.
The manual provides a chart correlating stitch settings with fabric types and intended uses. Experimenting with these adjustments is encouraged, but the manual cautions against extreme settings that could damage the machine or fabric. Precise control over stitch length and width allows for customized sewing, enhancing both functionality and aesthetic appeal. Always test settings on scrap fabric first!
Reverse Stitch Lever

The Janome 3160QDC instruction manual details the function of the reverse stitch lever, crucial for securing seams. Located conveniently, this lever, when depressed, reverses the stitch direction, creating a backstitch. Backstitching at the beginning and end of a seam prevents unraveling, ensuring durability.
The manual emphasizes using the lever briefly, typically a few stitches, to avoid bulky seams. It also notes that some stitch patterns may not be suitable for reverse stitching. Proper use of the reverse stitch lever, as outlined in the manual, is fundamental to achieving professional-quality results. Practice on scrap fabric to master the technique and avoid unnecessary fabric bunching.
Needle Position Adjustment
The Janome 3160QDC instruction manual explains the needle position adjustment feature, offering versatility for various sewing tasks. This allows you to shift the needle’s vertical position – up or down – when stopping. Setting the needle to stop in the up position is ideal for pivoting fabric, essential in quilting and appliqué. Conversely, stopping with the needle down secures the fabric, preventing shifting during turns.
The manual details how to access and change this setting, typically through a button or menu option. Mastering needle position adjustment enhances control and precision, particularly for intricate projects. Experimenting with both settings, as recommended in the manual, unlocks greater creative freedom and improves sewing accuracy.
Basic Sewing Operations
The Janome 3160QDC instruction manual guides users through fundamental techniques: stitch selection, starting/stopping, straight and zigzag stitching, and essential backstitching practices.
Selecting a Stitch
The Janome 3160QDC instruction manual details the stitch selection process, utilizing the clearly marked stitch dial. This dial allows for easy navigation through a variety of stitch options, catering to diverse sewing needs. Begin by locating the desired stitch number or symbol on the dial, referencing the stitch chart within the manual for identification.
Once identified, rotate the dial until the corresponding stitch is aligned with the needle position indicator. Ensure the dial clicks securely into place to guarantee accurate stitch selection. The manual emphasizes verifying the selected stitch by performing a test stitch on scrap fabric before commencing your project. This preventative measure confirms the chosen stitch is appropriate for the fabric and desired outcome.
Furthermore, the manual illustrates how certain stitches require specific presser feet for optimal performance, highlighting the importance of selecting the correct foot alongside the stitch.
Starting and Stopping the Machine
The Janome 3160QDC instruction manual provides clear guidance on initiating and halting sewing operations. To begin, ensure the presser foot is lowered – a safety feature preventing operation without fabric in place. Gently depress the foot pedal to start the machine; the sewing speed is directly proportional to the pedal’s pressure.
The manual stresses the importance of a gradual start, allowing the machine to gain momentum smoothly. To stop, simply release the foot pedal. For precise stopping points, utilize the needle up/down button, as detailed in the manual, which halts the needle in either position.
Always lift the presser foot and needle before maneuvering fabric, preventing damage to both the material and the machine. The manual also cautions against abrupt stops, recommending a controlled release of the foot pedal for consistent results.
Straight Stitching
The Janome 3160QDC instruction manual details achieving perfect straight stitches. Select the straight stitch option using the stitch selection dial, typically indicated by a straight line symbol. Adjust the stitch length according to your fabric and project needs – shorter stitches for delicate fabrics, longer for heavier materials.
The manual emphasizes maintaining a consistent seam allowance by utilizing the markings on the needle plate as a guide. Begin by lowering the presser foot and gently depressing the foot pedal. Guide the fabric smoothly, avoiding pulling or pushing, allowing the machine to feed the material evenly.
For extended seams, the manual suggests using a comfortable pace and maintaining a consistent hand position. Practice on scrap fabric to refine your technique before working on your final project.
Zigzag Stitching
The Janome 3160QDC instruction manual explains utilizing the zigzag stitch for various applications, from finishing raw edges to creating decorative elements. Select the zigzag stitch on the stitch selection dial – it’s usually represented by a zigzag pattern. Adjust both the stitch length and width according to your desired effect; wider and longer stitches create bolder patterns, while narrower and shorter stitches are ideal for edge finishing.
The manual advises testing different settings on scrap fabric to determine the optimal combination for your fabric type and project; Maintain a consistent fabric feed, guiding it gently without pulling.
Zigzag stitching is excellent for preventing fabric fraying and adding elasticity to seams. Refer to the manual’s diagrams for precise adjustments.
Backstitching
The Janome 3160QDC instruction manual details the importance of backstitching to secure seams at the beginning and end of a sewing line. Engage the reverse stitch lever – typically located on the left side of the machine – to initiate backstitching. Sew a few stitches forward, then depress the lever and sew backwards over those stitches for approximately half an inch.
Release the lever to return to forward stitching and continue your seam. Repeat the backstitching process at the end of the seam to prevent unraveling.
The manual emphasizes consistent backstitching length for seam strength. Practice on scrap fabric to achieve a neat and secure finish, referencing the manual’s illustrations for proper technique.
Advanced Features and Techniques
The Janome 3160QDC instruction manual unlocks quilting potential, drop-in bobbin mastery, needle selection expertise, and presser foot versatility for skilled sewing.
Quilting with the Janome 3160QDC
The Janome 3160QDC instruction manual details how this machine excels in quilting, offering a smooth and precise experience for both beginners and experienced quilters. It highlights the extended throat space, crucial for handling larger quilt pieces with ease, minimizing the need for frequent repositioning of fabric.
The manual explains utilizing the even feed foot for consistent fabric layers, preventing puckering and ensuring accurate stitch placement. It also covers free-motion quilting techniques, demonstrating how to drop the feed dogs and use the provided open-toe foot for creative designs.

Furthermore, the guide provides insights into stitch selection for various quilting styles, from simple straight-line quilting to intricate patterns. Mastering the adjustable presser foot pressure is also covered, allowing for optimal control over fabric layers and stitch quality. Refer to the manual for detailed diagrams and step-by-step instructions to unlock the full quilting potential of your 3160QDC.
Using the Drop-in Bobbin System
The Janome 3160QDC instruction manual emphasizes the convenience of its drop-in bobbin system. This feature allows for quick and easy bobbin changes, eliminating the need to remove access panels or navigate complex threading paths. The manual provides clear diagrams illustrating the correct bobbin winding and insertion techniques, ensuring smooth operation.
It details how to monitor bobbin thread levels through the transparent bobbin cover, preventing unexpected thread run-out during sewing. Proper bobbin tension adjustment is also explained, crucial for achieving balanced stitches and preventing looping or puckering.
The guide stresses using genuine Janome bobbins for optimal performance and to avoid potential machine damage. Following the manual’s instructions ensures a hassle-free experience with the drop-in bobbin, contributing to efficient and enjoyable sewing.
Needle Types and Their Applications
The Janome 3160QDC instruction manual dedicates a section to understanding needle types, crucial for achieving optimal stitch quality. It details various needle sizes (e.g., 70/10, 80/12, 90/14) and their corresponding fabric weights, guiding users to select the appropriate needle for their project.
Universal needles are recommended for woven fabrics, while ballpoint needles are ideal for knits, preventing skipped stitches and fabric damage. The manual also explains the use of stretch needles for highly elastic fabrics like Lycra and denim needles for heavier materials.
Furthermore, it highlights the importance of replacing needles regularly to maintain stitch quality and prevent thread breakage. Correct needle insertion is also demonstrated, ensuring proper alignment and secure fastening within the machine.
Presser Feet Options and Usage
The Janome 3160QDC instruction manual thoroughly explains the diverse range of presser feet available and their specific applications. It details the standard zig-zag foot for general sewing, the satin stitch foot for decorative stitches, and the blind hem foot for creating invisible hems.
A rolling foot is recommended for delicate or slippery fabrics, while the open-toe appliqué foot provides enhanced visibility for precise placement. The manual also covers the quilting foot, designed for even stitch distribution during quilting projects.
Detailed diagrams illustrate how to correctly attach and detach each presser foot, ensuring secure operation. Proper foot selection significantly impacts stitch quality and overall sewing results, as emphasized within the guide.
Troubleshooting Common Sewing Problems
The Janome 3160QDC instruction manual dedicates a section to resolving frequent sewing issues. It addresses problems like thread bunching, often caused by improper threading or incorrect tension settings, providing step-by-step solutions. Skipped stitches are tackled with guidance on needle type, size, and correct insertion.
The manual also offers advice for fabric puckering, suggesting adjustments to stitch length and pressure foot pressure. It details how to diagnose and fix broken needles, emphasizing safety precautions.
Furthermore, it covers issues with the bobbin system, including troubleshooting uneven stitches and bobbin jams, ensuring users can maintain optimal machine performance and resolve common errors efficiently.

Maintenance and Care
The Janome 3160QDC instruction manual stresses regular cleaning, oiling, and needle replacement to ensure longevity and optimal sewing performance for years!
Cleaning the Machine
Regular cleaning, as detailed in the Janome 3160QDC instruction manual, is crucial for maintaining peak performance. Always disconnect the power before commencing any cleaning procedures. Use a soft brush to remove lint and dust from the bobbin area, feed dogs, and surrounding components. A small vacuum cleaner attachment can also be helpful for reaching tight spaces.
Avoid using liquid cleaners directly on the machine; instead, dampen a soft cloth with a mild detergent solution and wipe down the exterior surfaces. Pay particular attention to areas where oil may accumulate. The needle plate should be cleaned after each use to prevent build-up of fabric fibers. Refer to the manual’s diagrams for specific cleaning points and recommended tools. Consistent cleaning prevents jams and ensures smooth operation, extending the life of your Janome 3160QDC.
Oiling the Machine
The Janome 3160QDC instruction manual emphasizes periodic oiling to ensure smooth, quiet operation. Locate the designated oiling points – typically indicated in the manual’s diagrams – and apply a few drops of high-quality sewing machine oil. Avoid over-oiling, as excess oil can attract lint and cause problems. Key areas include the bobbin race, hook assembly, and any moving parts that appear dry.
Use the oil sparingly and wipe away any excess with a clean cloth. Regular oiling reduces friction, preventing wear and tear on internal components. It’s recommended to oil the machine after every 8 hours of use, or more frequently if operating in dusty environments. Always refer to the manual for specific oiling instructions and recommended oil types to maintain your Janome’s performance.
Replacing the Needle
The Janome 3160QDC instruction manual details a straightforward needle replacement process. First, ensure the machine is powered off. Loosen the needle clamp screw using the screwdriver provided. Gently pull the old needle upwards and discard it safely – needles are sharp! Insert a new needle, ensuring the flat side faces the back of the machine.
Tighten the needle clamp screw firmly, but not excessively. A loose needle can cause skipped stitches, while an overtightened screw may damage the needle or clamp. Always use the correct needle type and size for your fabric. Regularly replacing the needle (after approximately 8 hours of sewing) maintains stitch quality and prevents fabric damage, as outlined in the manual.

Troubleshooting Guide
The Janome 3160QDC instruction manual provides a helpful troubleshooting section. For skipped stitches, check the needle is correctly inserted, the thread is properly threaded, and the correct needle type is used. If the thread breaks frequently, re-thread the machine, ensuring proper tension. Bobbin issues, like tangled thread, often require re-winding the bobbin or cleaning the bobbin case.
If the machine jams, stop immediately and carefully remove the fabric and thread. Never force it! Consult the manual for specific error codes if displayed. Regular cleaning and oiling, as detailed within, prevent many common problems. Remember safety precautions – always disconnect the power before performing any maintenance or troubleshooting steps.
Safety Precautions
The Janome 3160QDC instruction manual emphasizes crucial safety measures. Always disconnect the power supply before cleaning, oiling, changing the needle, or performing any maintenance. Keep fingers away from the needle while the machine is operating. Never attempt to repair the machine yourself; contact a qualified technician for complex issues.
Ensure the machine is placed on a stable, level surface during use. Do not operate the machine if the power cord is damaged. Keep the machine out of reach of children. Avoid sewing over pins or thick materials that could damage the needle. Read all instructions carefully before use to understand potential hazards and operate the machine safely.