Welcome to the New Home sewing machine manual, your guide to mastering this versatile and reliable sewing companion. This manual covers models like the New Home 70, 444, and 609, providing detailed instructions for both basic and advanced stitching techniques, along with essential safety tips and maintenance routines to ensure optimal performance.
1.1 What is a Manual New Home Sewing Machine?
A manual New Home sewing machine is a household appliance designed for sewing fabrics, offering versatility and reliability for both beginners and experienced users. It is known for its durability and efficiency, supporting various stitching techniques such as straight stitching, reverse stitching, and specialized tasks like sewing buttonholes and zippers. Available in models like the New Home 70, 444, and 609, these machines are equipped with essential accessories and attachments to enhance sewing capabilities. The machine’s user-friendly design ensures ease of operation, making it a practical choice for crafting, repairs, and creative projects. Its robust construction and adaptable features make it a trusted companion for sewists worldwide.
1.2 Importance of the Instruction Manual
The instruction manual is an essential resource for understanding and utilizing your New Home sewing machine effectively. It provides step-by-step guidance for setting up, operating, and maintaining the machine, ensuring optimal performance and longevity; The manual covers troubleshooting, safety precautions, and detailed instructions for various stitching techniques, making it indispensable for both beginners and experienced users. By following the manual, users can avoid common mistakes, enhance their sewing skills, and explore advanced features. It also serves as a quick reference for resolving issues and maximizing the machine’s capabilities. This comprehensive guide empowers users to unlock the full potential of their New Home sewing machine, fostering creativity and efficiency in every project.
Safety Guidelines for Using the Sewing Machine
Always turn off the machine when adjusting the needle area or changing settings. Keep children away and avoid loose clothing near moving parts. Use the correct needle plate to prevent breakage and ensure safe operation. Follow all precautions to avoid accidents and maintain a safe sewing environment.
2.1 Safety Precautions Before Starting
Before using your New Home sewing machine, ensure the area is clear of clutter and liquids. Always turn off the machine when adjusting the needle or bobbin. Keep loose clothing and long hair tied back to avoid entanglement. Ensure children are supervised and kept at a safe distance. Use the correct needle plate to prevent needle breakage. Avoid touching sharp parts like the needle or rotary hook. Properly handle the power cord to prevent damage or tripping hazards. Never operate the machine near open flames or sparks. Ensure the machine is placed on a stable, flat surface. Follow these precautions to ensure a safe and enjoyable sewing experience.
2.2 Handling the Sewing Machine Needle
Always handle the sewing machine needle with care to avoid accidents. Turn off the machine before replacing or adjusting the needle. Use a needle inserter to avoid touching sharp edges. Never insert or remove the needle with bare hands, as this can cause injury. Ensure the needle is properly seated and aligned to prevent breakage. Avoid touching the needle during operation, as it moves rapidly and can cause harm. Keep spare needles in a safe place, out of reach of children. Regularly inspect the needle for damage and replace it if necessary. Proper handling ensures safety and optimal sewing performance.
2.3 Electrical Safety Tips
Always unplug the sewing machine when making adjustments, such as threading the needle or changing the bobbin, to avoid accidental start-ups. Ensure the machine is placed on a stable, dry surface away from water sources. Avoid using damaged cords or plugs, as they can cause electrical hazards. Never touch electrical components with wet hands. Keep children away from the machine while it is in use. Regularly inspect the power cord for signs of wear and replace it if necessary. If the machine malfunctions, disconnect it from the power source immediately. Proper electrical safety precautions ensure a safe and efficient sewing experience.
Unboxing and Initial Setup of the Sewing Machine
Unboxing your New Home sewing machine is exciting! Carefully inspect the machine and accessories, ensuring all parts are included and undamaged. Set up your workspace neatly, ensuring good lighting and a stable surface. Familiarize yourself with the machine’s components and ensure compatibility with various fabrics for optimal performance.
3.1 Unboxing the Sewing Machine
Unboxing your New Home sewing machine is an exciting step! Carefully open the packaging and inspect the machine for any visible damage. Ensure all accessories, such as bobbins, needles, presser feet, and the user manual, are included. Check for model-specific items, such as the New Home 70, 444, or 609, which may include additional attachments like zipper feet or overlock options. Gently remove the machine from its packaging and place it on a stable, flat surface. Before turning it on, verify that all components are accounted for and properly secured. Refer to the manual for a detailed list of included parts and accessories. This ensures your sewing experience starts smoothly and efficiently.
3;2 Initial Checks and Preparation
After unboxing, perform a thorough inspection of your New Home sewing machine. Check for any signs of damage or missing parts. Verify that all accessories, such as bobbins, needles, and presser feet, are included. Ensure the power cord is undamaged and suitable for your voltage requirements. Lightly oil the machine’s hinges and moving parts if recommended by the manual. Familiarize yourself with the control panel and settings. Before turning it on, ensure the machine is placed on a stable, flat surface. Consult the manual for specific preparation steps, such as setting the bobbin or adjusting tension. Proper preparation ensures smooth operation and prevents potential issues during use.
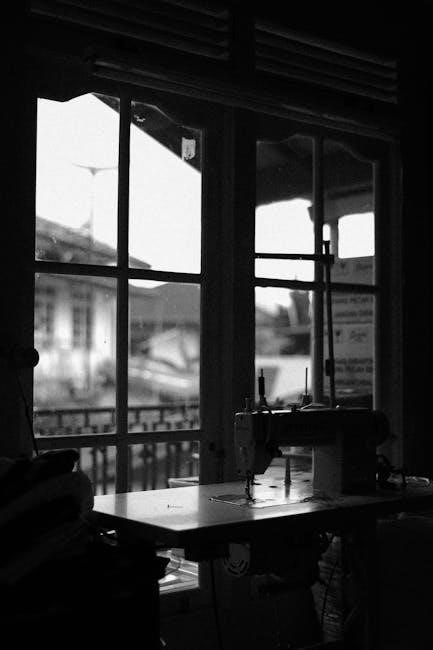
3.3 Setting Up the Workspace
Creating a well-organized workspace is essential for efficient sewing. Place the machine on a sturdy, flat surface, away from direct sunlight to avoid glare. Ensure good lighting to clearly see your fabric and stitches. Keep essential supplies, such as threads, bobbins, and needles, within easy reach. Maintain a clean and clutter-free area to prevent accidents and misplacement of small parts. Position the machine at a comfortable height to avoid strain while sewing. Ensure the power cord is securely connected and away from foot traffic. A well-organized workspace enhances productivity and safety, making your sewing experience more enjoyable and stress-free.
Understanding the Sewing Machine Components
The sewing machine features essential components like the needle, bobbin, spool pins, and presser foot. These parts work together to ensure smooth stitching and fabric handling.
4.1 Major Parts of the Sewing Machine
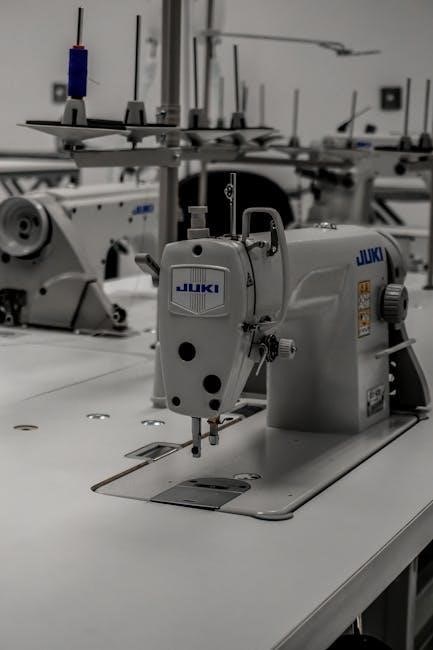
The New Home sewing machine consists of several key components essential for its operation. The needle is central to stitching, moving up and down to create thread loops. The bobbin holds the underside thread, ensuring proper stitch formation. Spool pins secure the thread, guiding it through the machine. The presser foot keeps fabric steady, while the feed dogs move the material smoothly. Additional parts like the stitch selector and tension dials allow customization of stitch type and thread tightness. Understanding these components is vital for effective use and maintenance of the machine, ensuring optimal performance across various fabrics and stitching techniques.
4.2 Accessories Included with the Machine
The New Home sewing machine comes with a variety of accessories to enhance your sewing experience. These include multiple bobbins for wound thread, ensuring continuous stitching without interruptions. A set of presser feet is provided, such as the standard foot, zipper foot, and buttonhole foot, each designed for specific tasks. Additional accessories like needle packs, spool caps, and spool pins are included to accommodate different thread types and fabric weights. Some models also feature specialized attachments, such as an overlock foot or embellishment guides, for advanced techniques. These accessories empower users to tackle a wide range of sewing projects with precision and ease, making the machine versatile for both beginners and experienced sewists.
Threading the Sewing Machine
Proper threading is essential for smooth operation. Place the spool on the spool pin, guide the thread through the tension disc, and follow the machine’s thread path. Gently pull the thread to ensure it’s seated correctly in the take-up lever and needle. Always turn the handwheel to assist the thread in passing through the needle. Proper threading prevents thread breakage and ensures even stitching. Refer to the step-by-step guide for detailed instructions specific to your New Home model.
5.1 Step-by-Step Guide to Threading
Start by placing the spool on the spool pin and winding the bobbin if needed. Pull the thread through the tension discs, ensuring it’s taut but not too tight. Guide the thread through the take-up lever, moving it to its highest position. Next, insert the thread through the needle eye from front to back. Gently pull the thread to remove any slack. For the bobbin, place it on the winder spindle, align the notch with the spring, and press down. Wind the bobbin evenly, then cut the thread. Finally, thread the machine as described, ensuring the thread flows smoothly through all guides. Always refer to your specific model’s instructions for precise threading paths and tension settings to avoid thread breakage or uneven stitches. Proper threading ensures consistent stitching and prevents machine damage.
5.2 Managing the Bobbin
Managing the bobbin is crucial for smooth sewing. Start by winding the bobbin evenly, ensuring the thread fills it without overlapping. Secure the bobbin on the winder spindle, aligning the notch with the spring, and wind until full. Once wound, cut the thread, leaving a small tail. Insert the bobbin into the bobbin case, ensuring it rotates correctly. Pull the thread gently to seat it properly. Always use the correct size and type of bobbin for your machine. If the bobbin is damaged or worn, replace it immediately to prevent tangling or uneven stitches. Keep spare bobbins handy for quick changes. Regularly clean the bobbin area to avoid lint buildup, which can affect performance. Proper bobbin management ensures consistent tension and prevents thread breakage during sewing. Follow your machine’s specific guidelines for optimal results.

Basic Stitching Techniques
Master straight stitching for consistent seams and reverse stitching to secure fabric edges. Adjust thread tension and fabric handling for smooth stitching. Keep the workspace tidy for optimal results.
6.1 Straight Stitch Sewing
Start by lowering the presser foot firmly on the fabric to ensure even feeding. Begin sewing at a slow, steady pace, keeping the fabric aligned with the edge guide. For straight stitching, select the straight stitch setting on your machine and maintain consistent tension. Always backstitch at the beginning and end of your seam for durability. Use the handwheel to manually position the needle if needed. Keep the workspace clean and well-lit to maintain accuracy. Regularly check thread tension to avoid puckering or loose stitches. For heavier fabrics, use a heavier-duty needle to prevent breakage. This technique is ideal for straight seams and hemming.
6.2 Reverse Stitching Techniques
Reverse stitching is essential for reinforcing seams at the beginning and end of your work. Engage the reverse stitch lever or button, located on the front or side of your New Home sewing machine, to sew backward. This technique ensures strong, durable stitching that prevents fraying. Start by sewing a few straight stitches forward, then reverse for 2-3 stitches, and continue forward again. Maintain steady fabric tension and adjust stitch length if needed. Avoid pulling the fabric while reversing to prevent distortion. Use this method for heavier fabrics or when sewing thick layers. Ensure the needle is in the down position before reversing for accurate alignment. Proper thread tension is crucial to avoid loose or uneven stitches during reverse sewing.
Advanced Stitching Techniques
Explore advanced techniques like sewing buttonholes, zippers, and embellishments. This chapter covers specialized stitches and methods for intricate projects, ensuring professional-grade results with your New Home machine.
7.1 Sewing Buttonholes
Sewing buttonholes is a key advanced technique for adding professional finishes to garments. The New Home sewing machine offers automatic buttonhole features, making the process efficient and precise. To start, select the buttonhole stitch option and choose the appropriate size. Place your fabric under the machine’s buttonhole foot, aligning the markings for accurate placement. Gently guide the fabric as the machine sews the hole. For manual adjustments, refer to your specific model’s instructions, such as the New Home 70, 444, or 609. Always use the correct needle and thread type for clean results. This feature ensures consistent and durable buttonholes every time.
7.2 Sewing Zippers and Embellishments
Sewing zippers and embellishments enhances your projects with professional touches. Start by using specialized feet, such as the zipper foot, for precise stitching. Align the zipper teeth with the fabric edge and sew slowly, maintaining steady tension. For embellishments, switch to decorative stitches or embroidery settings. Use the included accessories like the overlock foot for smooth results. Always test stitches on scrap fabric to ensure proper tension and alignment. For intricate designs, consult your machine’s guide, such as the New Home 609, for specific settings. Proper needle and thread selection are crucial for clean finishes. This feature allows you to add functional and decorative elements effortlessly.

Maintenance and Care of the Sewing Machine
Regular cleaning and lubrication are essential for smooth operation. Turn off the machine when handling the needle or bobbin. Use the correct needle plate to prevent damage. Proper care ensures long-lasting performance and reliability.
8.1 Cleaning the Sewing Machine
Regular cleaning is crucial for maintaining your New Home sewing machine’s performance. Use a soft brush to remove lint and debris from the bobbin compartment and tension discs. Turn off the machine before cleaning to ensure safety. Gently wipe the exterior with a damp cloth, avoiding harsh chemicals. Oil the machine as recommended to keep it well-lubricated and running smoothly. Clean the needle area thoroughly to prevent thread breakage. Always refer to the manual for specific cleaning instructions tailored to your model. Proper cleaning prevents dust buildup and ensures precise stitching. Regular maintenance will extend the life of your sewing machine and keep it functioning optimally.
8.2 Lubricating the Machine
Proper lubrication is essential for the smooth operation of your New Home sewing machine. Turn off the machine before applying a few drops of sewing machine oil to the bobbin area, tension discs, and other moving parts. Use only high-quality oil recommended in the manual to prevent damage. Gently wipe off any excess oil with a soft cloth to avoid attracting dust. Regular lubrication ensures the machine runs quietly and efficiently, reducing wear and tear. Always refer to the manual for specific lubrication points and frequency. Proper maintenance will keep your sewing machine in excellent working condition and extend its lifespan.
Troubleshooting Common Issues
This section addresses common problems like thread breakage, needle issues, and bobbin winding difficulties. Identify symptoms, understand causes, and prepare for solutions to ensure smooth sewing operations.
9.1 Common Sewing Machine Problems
Common issues with the New Home sewing machine include thread breakage, needle damage, and improper bobbin winding. Users may also encounter uneven stitching, tension problems, or machine jamming. These problems often arise from incorrect threading, using the wrong needle type, or neglecting regular maintenance. Additionally, issues like misaligned presser feet or poor fabric guidance can lead to sewing inaccuracies. Recognizing these common problems early helps in applying the right solutions to maintain smooth and efficient sewing operations. Proper troubleshooting ensures extended machine longevity and consistent performance, keeping your sewing projects on track without unnecessary delays or repairs.
9.2 Solutions for Thread Breakage
Thread breakage can be resolved by checking the machine’s tension settings, ensuring proper threading, and using the correct needle type. If the thread frequently breaks, inspect for lint buildup or debris in the tension discs and bobbin area. Re-thread the machine following the manual’s guide, ensuring the thread passes through all guides smoothly. Replace worn or damaged needles, as dull needles can cause thread to snap. Adjust the bobbin tension if necessary, and ensure the presser foot is lowered before sewing. Regular cleaning and lubrication also prevent thread breakage by maintaining smooth operation. Always use high-quality thread suitable for your fabric type to minimize issues.

Accessories and Attachments
Discover a variety of accessories, including overlock feet, zipper feet, and specialized attachments, designed to enhance your sewing experience with the New Home sewing machine.
10.1 Types of Sewing Machine Accessories
The New Home sewing machine offers a range of accessories to enhance your sewing experience. These include overlock feet, zipper feet, and specialized attachments for embroidery or quilting. Additional accessories like bobbin cases, extra needles, and presser feet for various fabrics ensure versatility. The machine also supports loop and foot attachments for sewing zippers and embellishments, making it ideal for diverse projects. Accessories like automatic bobbin winders simplify tasks, while optional extensions and storage cases keep your workspace organized. These tools are designed to cater to different sewing needs, from basic repairs to intricate designs, ensuring efficiency and precision in every stitch.
10.2 Using Specialized Attachments
Specialized attachments for the New Home sewing machine enhance its functionality, allowing for precise stitching and intricate designs. The zipper foot simplifies sewing zippers and piping, while the overlock foot ensures clean finishes on fabric edges. Embellishment feet enable decorative stitching, perfect for embroidery or quilting. To use these attachments, align them with the machine’s shank and secure them firmly. Always refer to the manual for specific installation instructions. Properly attaching these tools ensures optimal performance and prevents damage to the machine or fabric. Experiment with different attachments to explore various sewing techniques and expand your creative possibilities while maintaining professional-quality results.

Model-Specific Instructions
This section provides detailed instructions for specific New Home sewing machine models, including the New Home 70, 444, and 609, covering their unique features, setup, and operation.
11.1 New Home 70 Sewing Machine
The New Home 70 sewing machine is a versatile and reliable model designed for household use. It offers straight-stitch sewing capabilities and is compatible with various fabric types. The machine features a user-friendly design, making it ideal for both beginners and experienced sewists. Included accessories such as the overlock foot and zipper foot enhance its functionality for specialized tasks. The New Home 70 also comes with an automatic bobbin winding system, simplifying the threading process. For optimal performance, ensure regular maintenance, such as cleaning and lubricating, as outlined in the manual. This model is a practical choice for everyday sewing projects, providing durability and consistent results.
11.2 New Home 444 Sewing Machine
The New Home 444 sewing machine is a household model designed for versatility and ease of use. It features a straight-stitch mechanism and is compatible with various fabrics, making it ideal for everyday sewing projects. The machine includes specialized attachments, such as a zipper foot and overlock, to enhance stitching options. Its automatic bobbin winding system simplifies threading, while the durable construction ensures long-lasting performance. The New Home 444 is known for its reliability and user-friendly design, making it a practical choice for sewists of all skill levels. The instruction manual provides detailed guidance for operation, maintenance, and troubleshooting, ensuring optimal use of the machine.
11.3 New Home 609 Sewing Machine
The New Home 609 sewing machine is a reliable and versatile model designed for household use. It offers a range of features, including straight-stitch sewing and compatibility with various fabrics. The machine is equipped with an automatic bobbin winding system, simplifying the threading process. Specialized attachments, such as zipper and overlock feet, expand its stitching capabilities. The New Home 609 is known for its durability and user-friendly design, making it suitable for sewists of all skill levels. The instruction manual provides comprehensive guidance on operation, maintenance, and troubleshooting, ensuring optimal performance and longevity of the machine. It is a practical choice for both basic and advanced sewing projects.
12.1 Best Practices for Using the Sewing Machine
Always start by preparing your workspace, ensuring it is clean and well-lit. Use the correct needle type and thread for your fabric to prevent breakage; Keep the machine at a stable temperature and avoid overloading it. Regularly clean and lubricate the machine to maintain its performance. Turn fabric slowly and smoothly for even stitching. Store the machine in a dry place when not in use. Refer to the manual for model-specific tips, like the New Home 70 or 609. Explore advanced features gradually and practice consistently to improve your skills. By following these practices, you’ll ensure safe, efficient, and high-quality sewing experiences.
12.2 Resources for Further Learning
For deeper understanding, refer to official New Home sewing machine manuals available online, such as the New Home 70, 444, and 609 models. Websites like eBay offer vintage and modern manuals for download. Join sewing communities and forums to connect with experts and enthusiasts. YouTube tutorials provide visual guidance for troubleshooting and advanced techniques. Explore Janome’s official website for compatible accessories and updated instructions. Additionally, local sewing classes or workshops can enhance your skills. These resources will help you master your New Home sewing machine and explore creative possibilities with confidence.