Ryobi Table Saw Instruction Manual: A Comprehensive Guide

Ryobi, a leading tool brand, provides diverse power solutions, and this manual details operation, safety, and maintenance for optimal project success and longevity.
Ryobi table saws represent a commitment to providing homeowners and DIY enthusiasts with reliable and versatile cutting solutions. As a cornerstone of the Ryobi power tool lineup, these saws are designed for a wide range of projects, from simple trim work to more complex woodworking endeavors. Ryobi’s dedication to innovation and affordability makes their table saws an excellent choice for both beginners and experienced users.
This instruction manual serves as a comprehensive guide to understanding, operating, and maintaining your Ryobi table saw. We will cover essential safety precautions, detailed assembly instructions, step-by-step operating procedures, and troubleshooting tips. By following the guidelines outlined in this manual, you can ensure safe and efficient operation, maximizing the performance and lifespan of your tool. Ryobi strives to empower users with the tools they need to bring their visions to life.
Understanding Your Ryobi Table Saw Model
Ryobi offers a variety of table saw models, each designed with specific features to cater to different needs and skill levels. Familiarizing yourself with your particular model is crucial for safe and effective operation. Key components include the table surface, blade, rip fence, miter gauge, blade guard, and anti-kickback pawls. Understanding the function of each part allows for precise adjustments and optimal cutting performance.
Refer to the model number located on the saw’s nameplate to identify specific features and capabilities. Ryobi’s commitment to user-friendly design means that most models share common functionalities, but variations exist in power, table size, and included accessories. This manual provides general guidance, but always consult the supplemental documentation specific to your model for detailed information and diagrams. Knowing your saw empowers you to tackle projects confidently.
Safety First: Essential Precautions
Ryobi table saws are powerful tools requiring strict adherence to safety guidelines. Always wear approved safety glasses and hearing protection during operation. Avoid loose clothing, jewelry, and tie back long hair to prevent entanglement. Never remove or bypass safety features like the blade guard and anti-kickback pawls. Maintain a clean and well-lit workspace, free from distractions.
Before each use, inspect the saw for damage and ensure all adjustments are secure. Disconnect the power cord when changing blades or performing maintenance. Never reach over the blade or position hands near the cutting path. Understand the potential for kickback and use appropriate push sticks and featherboards. Prioritizing safety ensures a productive and injury-free woodworking experience with your Ryobi table saw.
General Safety Rules
Always read and understand this manual before operating your Ryobi table saw. Keep this manual readily available for future reference. Ensure a stable and level working surface. Never operate the saw when tired or under the influence of drugs or alcohol. Maintain situational awareness and focus solely on the cutting task. Use only blades specifically designed for the saw’s speed and application.
Avoid cutting small pieces without proper support. Never force the material through the blade; let the saw do the work. Be mindful of the power cord’s location to prevent tripping hazards. Regularly inspect and maintain the saw according to the maintenance schedule. Following these general safety rules will significantly reduce the risk of accidents and ensure safe operation.
Specific Safety Features of Ryobi Table Saws
Ryobi table saws incorporate several key safety features. The blade guard provides a physical barrier, minimizing accidental contact with the rotating blade. Anti-kickback pawls help prevent the workpiece from being thrown back towards the operator during a bind. A riving knife, positioned behind the blade, reduces pinching and kickback potential. Many models feature a quick-stop brake for rapid blade stoppage in emergencies.
Inspect these features before each use, ensuring they are properly adjusted and functioning correctly. Never disable or bypass safety devices. Familiarize yourself with the location and operation of the emergency stop switch. Understanding and utilizing these specific safety features is crucial for preventing injuries and maintaining a safe working environment.
Assembly and Setup
Proper assembly and setup are vital for safe and accurate operation; carefully follow these instructions to ensure your Ryobi table saw performs optimally.
Unboxing and Parts Identification
Carefully unpack your Ryobi table saw, verifying all components against the parts list included within the packaging. This crucial first step ensures nothing is missing before proceeding with assembly. Identify the table saw base, legs, blade, rip fence, miter gauge, blade guard, anti-kickback pawls, and all accompanying hardware – screws, bolts, and washers.
Retain the packaging and parts list for future reference, especially regarding warranty claims or potential replacement needs. Inspect each part for any shipping damage; report any issues immediately to the retailer or Ryobi customer support. Familiarize yourself with the names and functions of each component to streamline the assembly process and enhance your understanding of the tool’s operation. A clear understanding of the parts will contribute to safe and efficient use.
Attaching the Legs and Base
Begin by carefully positioning the table saw base upside down on a protected surface to prevent scratching. Align the legs with the designated mounting points on the base, ensuring proper orientation as illustrated in the assembly diagram. Secure each leg using the provided bolts and washers, tightening them firmly but not excessively – avoid stripping the threads.
Double-check the stability of the leg attachments before proceeding. A wobbly base can compromise safety and accuracy during operation. Once all legs are securely fastened, carefully flip the assembled table saw upright. Ensure it stands level and stable on a flat surface. Minor adjustments can be made using leveling feet, if equipped, to compensate for uneven flooring.
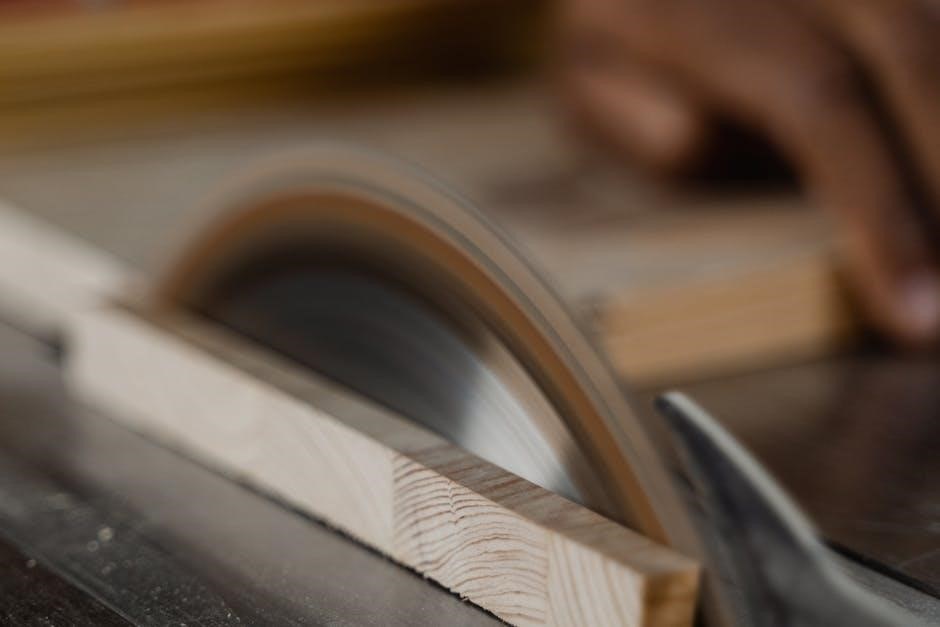
Installing the Blade

Before installing the blade, always disconnect the power cord to prevent accidental activation. Locate the blade mounting flange and carefully remove the blade guard for access. Position the blade onto the arbor, ensuring the blade teeth point in the correct direction – typically forward. Align the blade’s mounting holes with the arbor’s threaded holes.
Secure the blade with the blade bolt and washer, tightening it firmly using the provided wrench. Do not overtighten, as this could damage the arbor or blade. Reinstall the blade guard and ensure it functions correctly. A properly installed blade is crucial for safe and accurate cutting. Verify blade stability by gently attempting to wiggle it – any excessive movement indicates a problem.
Blade Types and Selection
Ryobi table saws accommodate various blade types for diverse cutting needs. General purpose blades, with 40-50 teeth, excel at ripping and crosscutting common materials like wood and plywood. For smoother cuts in hardwoods or plywood, opt for blades with a higher tooth count – 60-80 teeth. Rip blades, featuring fewer teeth (24-30), are designed for fast, efficient ripping along the grain.
Crosscut blades, with a higher tooth count and specialized angles, deliver clean, precise cuts across the grain. Consider specialty blades for materials like metal, plastic, or non-ferrous metals. Always verify the blade’s arbor size matches your Ryobi saw, and ensure the blade’s maximum RPM rating exceeds the saw’s speed.
Correct Blade Installation Procedure
Always disconnect the power cord before changing blades! Use the provided wrench to loosen the arbor nut. Secure the blade with the arbor flange, ensuring the teeth point in the correct rotation direction – towards the front of the saw. Tighten the arbor nut securely, but avoid over-tightening.
Verify the blade spins freely. Never operate the saw without the blade guard properly installed. Double-check that the blade is correctly seated on the arbor flanges. A loose blade can cause dangerous wobble and inaccurate cuts. Regularly inspect the arbor nut for tightness during use. Proper installation is crucial for safety and optimal performance.
Adjusting the Rip Fence
The rip fence ensures accurate, parallel cuts. Loosen the locking mechanism on the rip fence, allowing it to slide along the table saw’s rails. Measure from the blade to your desired cut width, using a reliable measuring tape. Align the rip fence with your measurement, ensuring it’s perfectly parallel to the blade.
Securely tighten the locking mechanism to fix the fence in place. Double-check the alignment before making any cuts. A misaligned rip fence will result in inaccurate and potentially dangerous cuts. For repetitive cuts, consider using a locking feature if your model has one. Regular checks for squareness are recommended.
Setting the Miter Gauge
The miter gauge facilitates precise angled cuts. Locate the miter gauge and slide it into the miter slot on the table saw’s surface. Loosen the locking knob on the gauge to adjust the angle. Use the degree markings on the gauge to set your desired miter angle, ensuring it clicks securely into place.
Tighten the locking knob firmly to prevent movement during operation. Always test the angle with a scrap piece of wood before cutting your final material. For frequently used angles, create custom stops for increased efficiency and accuracy. Regularly inspect the miter gauge for wear and tear, ensuring smooth operation.

Operating Instructions
Before each use, confirm all safety features are functional, and the blade is securely installed; always prioritize safe operation for optimal results.

Powering On and Initial Checks
Before initiating any cutting operation, a thorough inspection is paramount for safe and efficient use of your Ryobi table saw. First, ensure the power cord is in good condition, free from any frays or damage, and properly grounded. Verify the blade is correctly installed, tightened securely, and rotates freely without obstruction.
Next, check the functionality of all safety features, including the blade guard, anti-kickback pawls, and emergency stop switch. Confirm the rip fence and miter gauge are locked in place, providing stable and accurate guidance. Finally, perform a brief “no-load” test by powering on the saw and listening for any unusual noises or vibrations.
This initial check confirms everything is functioning as intended, minimizing risks and maximizing control during your woodworking projects. Always prioritize safety and proper setup before commencing any cutting task.
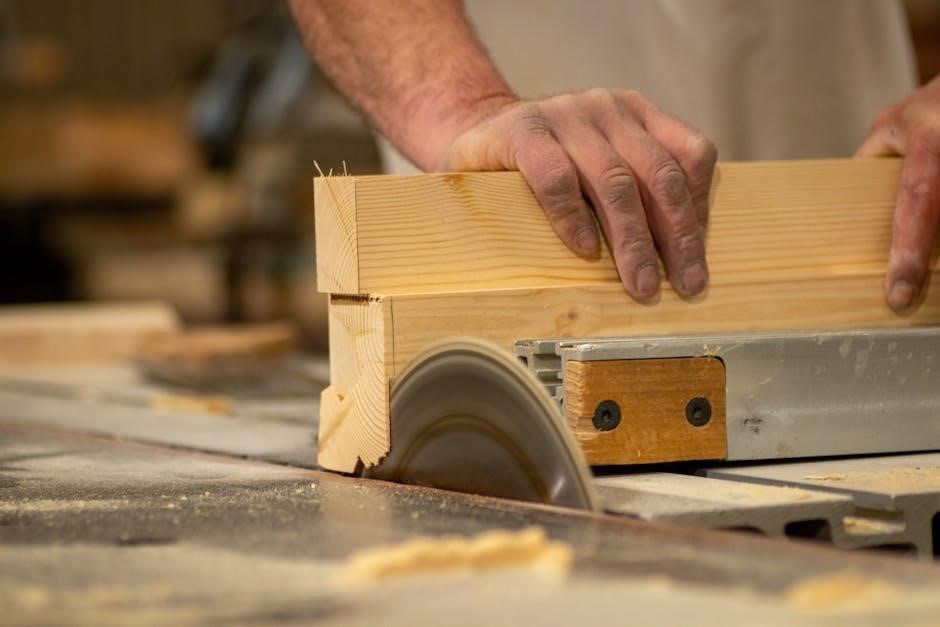
Making Straight Cuts
Achieving precise, straight cuts with your Ryobi table saw requires careful technique and attention to detail. Begin by securely locking the rip fence at the desired distance from the blade, ensuring it’s parallel to the blade’s path. Feed the workpiece slowly and steadily against the fence, maintaining consistent pressure throughout the cut.
Utilize a push stick, especially when cutting narrower pieces, to guide the wood past the blade and keep your hands safely away. Avoid forcing the material; let the blade do the work. For longer boards, consider using an outfeed support table to prevent sagging and ensure a clean, straight edge.
Regularly check the fence alignment and make adjustments as needed to maintain accuracy. Practice makes perfect – start with scrap wood to refine your technique.
Performing Miter Cuts
Miter cuts, essential for creating angled joints, are easily accomplished with your Ryobi table saw’s miter gauge. Loosen the miter gauge locking knob and adjust it to the desired angle, utilizing the degree markings for precision. Securely lock the gauge in place before beginning your cut.
Ensure the workpiece is firmly against both the miter gauge and the table saw’s fence for accurate results. Feed the wood smoothly through the blade, maintaining consistent pressure. For longer pieces, support the material to prevent binding or kickback.
Always double-check the angle setting before each cut and practice on scrap wood to verify accuracy. Remember safety first – never reach over the blade!
Performing Bevel Cuts
Bevel cuts, creating angled slices through the thickness of the wood, require tilting the table saw blade. Unlock the blade tilt mechanism, typically located at the rear of the saw, and adjust it to the desired angle using the scale. Securely tighten the locking handle once the angle is set.
Always verify the bevel angle with a protractor or angle finder for maximum accuracy. When making bevel cuts, ensure the rip fence is appropriately positioned to support the workpiece. Feed the wood slowly and steadily, maintaining firm control throughout the cut.
Remember to always use appropriate safety gear and be mindful of the blade’s angle during operation.
Using the Blade Guard and Anti-Kickback Pawls
The blade guard is a crucial safety feature, shielding your hands from accidental contact with the rotating blade. Always ensure it’s properly installed and functioning before each cut. The anti-kickback pawls prevent the workpiece from being thrown back towards the operator during a cut, significantly reducing injury risk.
These pawls should move freely and engage the wood immediately behind the blade. Regularly inspect both the guard and pawls for damage or wear, replacing them if necessary. Never disable or bypass these safety devices; they are designed to protect you.
Proper use dramatically enhances safety during operation;
Maintenance and Troubleshooting
Regular upkeep ensures peak performance and extends the life of your Ryobi table saw; addressing issues promptly prevents further damage and maintains safety.
Regular Cleaning and Lubrication
Maintaining a clean Ryobi table saw is crucial for both performance and safety. After each use, disconnect the power source and thoroughly remove sawdust and debris from the table surface, blade guard, and internal components using a brush or vacuum. Avoid using compressed air, as it can spread fine dust into sensitive areas.
Periodically, lubricate moving parts like the elevation and tilt mechanisms, as well as the rip fence rails, with a light machine oil. This ensures smooth operation and prevents binding. Check the drive belt for wear and tension, and adjust or replace it as needed. A well-maintained saw operates efficiently and reduces the risk of accidents. Remember to wipe down all surfaces with a clean cloth after lubrication to prevent dust accumulation.
Blade Changes and Maintenance
Regular blade changes are essential for optimal cutting performance and safety with your Ryobi table saw. Always disconnect the power before attempting any blade maintenance. When changing blades, ensure the correct blade type is selected for the material being cut. Inspect blades frequently for dullness, damage, or missing teeth.
Sharpening or replacing dull blades prevents kickback and ensures clean cuts. Clean blades after each use to remove pitch and resin buildup, which can affect cutting efficiency. Store blades properly in a blade case to protect the teeth. A well-maintained blade contributes significantly to the accuracy and safety of your woodworking projects.
Troubleshooting Common Issues
Encountering problems with your Ryobi table saw is common, but many are easily resolved. If the saw doesn’t start, check the power cord, circuit breaker, and safety switch. Blade wobbling often indicates a loose blade nut or damaged arbor. Inaccurate cuts can stem from a misaligned rip fence or dull blade – ensure proper adjustments and blade sharpness.
Persistent issues may require professional service. Always disconnect power before inspecting or attempting repairs. Refer to the full manual for detailed diagrams and troubleshooting steps. Prioritize safety and avoid forcing any components. Regular maintenance minimizes the likelihood of these common problems arising during operation.
Saw Not Starting
If your Ryobi table saw fails to power on, begin with the simplest checks. Verify the power cord is securely plugged into a functioning outlet. Next, inspect your circuit breaker or fuse box to ensure the circuit hasn’t tripped or blown. Examine the safety switch – it must be engaged for the saw to operate. A faulty switch may require replacement.
Further investigation involves checking the motor brushes for wear, and confirming the start button isn’t damaged. If these steps don’t resolve the issue, consult a qualified technician. Always disconnect the power cord before any inspection or repair attempts to prevent accidental activation.
Blade Wobbling
Blade wobble during operation indicates a potential issue requiring immediate attention. First, ensure the blade is correctly and securely mounted to the arbor. A loose blade nut is a common cause. Verify the blade is clean and free from debris or buildup, as imbalances can induce wobble. Inspect the arbor shaft for any signs of bending or damage; a damaged arbor necessitates replacement.
Additionally, check the trunnion assembly for looseness, as this supports the blade. Tighten any loose bolts or screws. If wobble persists, a worn bearing within the arbor assembly could be the culprit, requiring professional repair or component replacement. Never operate the saw with a wobbling blade.
Inaccurate Cuts
Inaccurate cuts often stem from improper setup or calibration. Begin by verifying the rip fence is perfectly parallel to the blade. Use a reliable measuring tool to confirm alignment. Ensure the miter gauge slots smoothly within the table slot and is set to the desired angle accurately. Check blade alignment; a bent or damaged blade will yield imprecise results.
Furthermore, confirm the blade height is appropriate for the material being cut. A blade too high can cause splintering, while too low may bind. Regularly inspect and adjust the table’s flatness; an uneven surface impacts cut accuracy. Always test cuts on scrap material before committing to the final piece.
Replacing the Drive Belt
To replace the drive belt, first disconnect the power cord to prevent accidental activation. Locate the access panel, typically on the underside of the saw, and remove it using the appropriate tool. Carefully release the tension on the motor mount to loosen the existing belt. Note the belt’s routing before removal – a photograph can be helpful!
Install the new belt, ensuring it’s seated correctly in all pulleys. Re-tension the motor mount, verifying the belt has proper tightness without being overly strained. Replace the access panel and reconnect the power cord. Test the saw’s operation briefly to confirm the belt is functioning smoothly and efficiently.

Advanced Techniques & Accessories
Enhance your Ryobi table saw’s capabilities with specialized accessories like zero-clearance inserts and outfeed support, improving precision and safety during complex cuts.

Using Push Sticks and Featherboards
Push sticks and featherboards are crucial safety enhancements when operating your Ryobi table saw, particularly for narrow stock. A push stick maintains a safe distance between your hands and the blade, preventing accidental contact during cuts. Always use a push stick when ripping pieces narrower than 6 inches.
Featherboards, on the other hand, apply consistent pressure to the workpiece against the fence and table, ensuring a stable and accurate cut. They minimize wandering and kickback, leading to cleaner results. Properly positioned featherboards significantly improve cut quality and operator control. Experiment with placement to find the optimal configuration for your specific cuts and material. Remember to always inspect these accessories before each use for damage or wear.
Ryobi Table Saw Accessories
Ryobi offers a range of accessories to enhance the functionality and precision of your table saw. Zero clearance inserts minimize tear-out, providing cleaner cuts, especially when working with plywood or delicate materials. These inserts fit snugly around the blade, supporting the wood fibers as you cut.
Outfeed support tables extend the work surface, crucial for handling larger pieces of lumber. They provide stability and prevent the material from tipping during the cut, improving safety and accuracy. Consider investing in a mobile base for increased portability. Explore options like dust collection ports and specialized jigs to further customize your setup for specific projects, maximizing your Ryobi table saw’s potential.
Zero Clearance Inserts
Zero clearance inserts are vital accessories for Ryobi table saws, dramatically improving cut quality. Standard inserts have a gap around the blade, causing tear-out, particularly in plywood and melamine. These inserts fit precisely around the blade, offering unwavering support to wood fibers during the cutting process.
This close fit minimizes splintering and chipping, resulting in cleaner, more professional-looking edges. They’re typically made from durable materials like phenolic or plastic. Installing a zero clearance insert is a simple upgrade that significantly enhances the performance of your saw. Regularly check for wear and replace as needed to maintain optimal cutting results and a safer working environment.
Outfeed Support Tables
Outfeed support tables are invaluable additions to your Ryobi table saw setup, especially when working with longer workpieces. These tables extend the supporting surface beyond the saw’s standard table, preventing long boards from tipping or sagging during cutting. This provides crucial stability and ensures accurate, consistent results.
They can be purchased as dedicated accessories or built DIY-style. Adjustable height and alignment features are beneficial for supporting material at the same level as the saw table. Proper outfeed support minimizes vibration and improves cut quality, particularly when ripping wider boards. Investing in or constructing an outfeed table significantly enhances the functionality and safety of your table saw.
Warranty Information and Support
Ryobi tools, including your table saw, are backed by a commitment to quality and customer satisfaction. A standard Ryobi warranty typically covers defects in materials and workmanship for a specified period, often three years, from the date of purchase. However, warranty terms can vary, so carefully review the documentation included with your specific model.
To initiate a warranty claim, retain your proof of purchase and contact Ryobi customer support through their website or phone number. They offer extensive online resources, including FAQs, manuals, and troubleshooting guides. For additional assistance, authorized Ryobi service centers are available for repairs and maintenance. Registering your tool online streamlines the support process.